Start with reCAPTCHA - This is Important!
To ensure that spam is not a problem for you and the entire Adventist Church & School Connect System, we have made reCAPTCHA a requirement to be able to receive email notifications for each form that is filled out and submitted. If you want one or more team members to receive an email with the details of the submissions, you MUST set up reCAPTCHA. Click Here to Set Up reCAPTCHA. Once reCAPTCHA is set up, you will be ready to add forms and receive responses from visitors.
Creating a New Form
There are two ways you can create a new form on your website.
You can create a form in the Form Collection first and then add it to a page or multiple pages.
Or you can edit a page and add (create) a new form to the page.
Form Collection - Adding, Editing, and Managing Forms:
In the dark gray Admin menu on the left side of the screen, the Forms Collection lets you create or edit existing forms.
You will also be able to see any other forms already created, such as when someone last responded to each form and how many responses each form currently has. The buttons allow you to "View Responses" that have been submitted, "Analyze Responses" that have been submitted, "Edit" a form, and, using the dropdown button, "Duplicate" a form or even "Delete" a form (and its data).
Click the blue "Add Form" button in the upper right corner to add a new form.
Add a Form While Editing a page
To add a form a page, edit the page that you want to add the form to.
First, edit the page where you want to add the form.
Click the place on the page where you want to inject the form into.
Next, click the dark gray Add Block icon (directly to the left of the blinking cursor) and select the Form option. You can use a new or existing form.
Existing Form
A popup will appear with a drop-down menu. Click the drop-down to see a list of all the already created forms, and then select one.
Adding a New Form
Add video


Start by adding a title to your form that will help administrators and contributors identify what the form is for in the "Form Title" box.
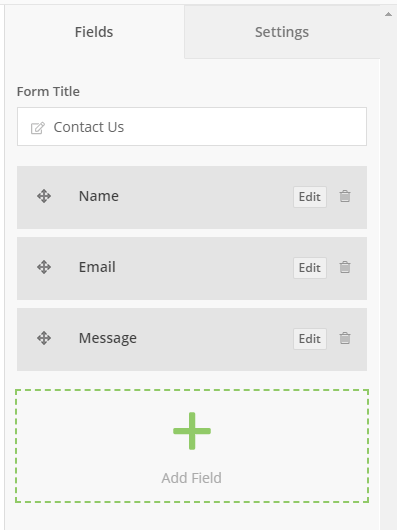
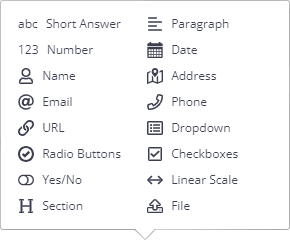
Next, add fields to the form by clicking the green "Add Field" plus sign.

The image here shows some of the available form fields. You can use any of these fields for your new form. Once you add a field, you will then see it in the preview window. When you have added the fields that you want, select the "Settings" tab in the upper right corner.

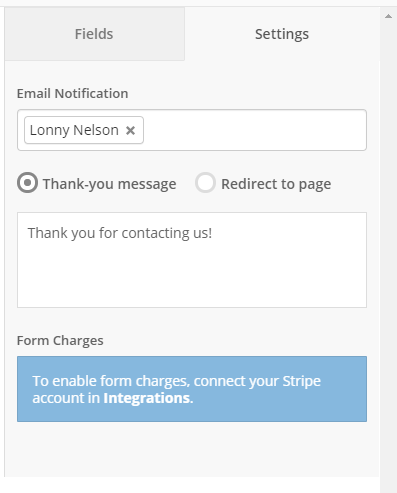
Settings
Here, you will be able to set the users who should get notifications. You can choose one or more specific users to receive an email notifying them about each form submission.
When the form is filled out and a visitor clicks the Submit button you can have the form give an on screen Thank You message or send them to a special page of your choosing.
The onscreen message can be edited here.
The special page can be set up by selecting the "Redirect to page" options and pasting the address for the specific special page.
All form submissions will also go to the forms database, and you can always check form submissions there. (Forms -> View Responses).

Finish
To save your form, click the blue "Save" button near the bottom of the page. If you are also editing a page, click the blue "Publish" button near the upper right side of the screen.